How to Fix Knock Knees (Valgus): Exercises & Alignment Guide
Introduction
Knock knees—medically known as knee valgus—is one of the most common lower-body alignment issues in both everyday life and calisthenics training. If your knees cave inward when you squat, land from a jump, or simply stand with your feet together, you are likely dealing with some degree of valgus alignment. Left uncorrected, it compromises squat depth, weakens pistol squat mechanics, and significantly increases the risk of ACL and meniscus injuries.
The encouraging news is that most cases of knock knees in adults are functional rather than structural, meaning they result from muscle imbalances and movement patterns that can be corrected with targeted training. This guide covers the anatomy behind knee valgus, how to assess yourself, the most effective corrective exercises and stretches, and a structured routine you can start today.
What Is Knee Valgus?
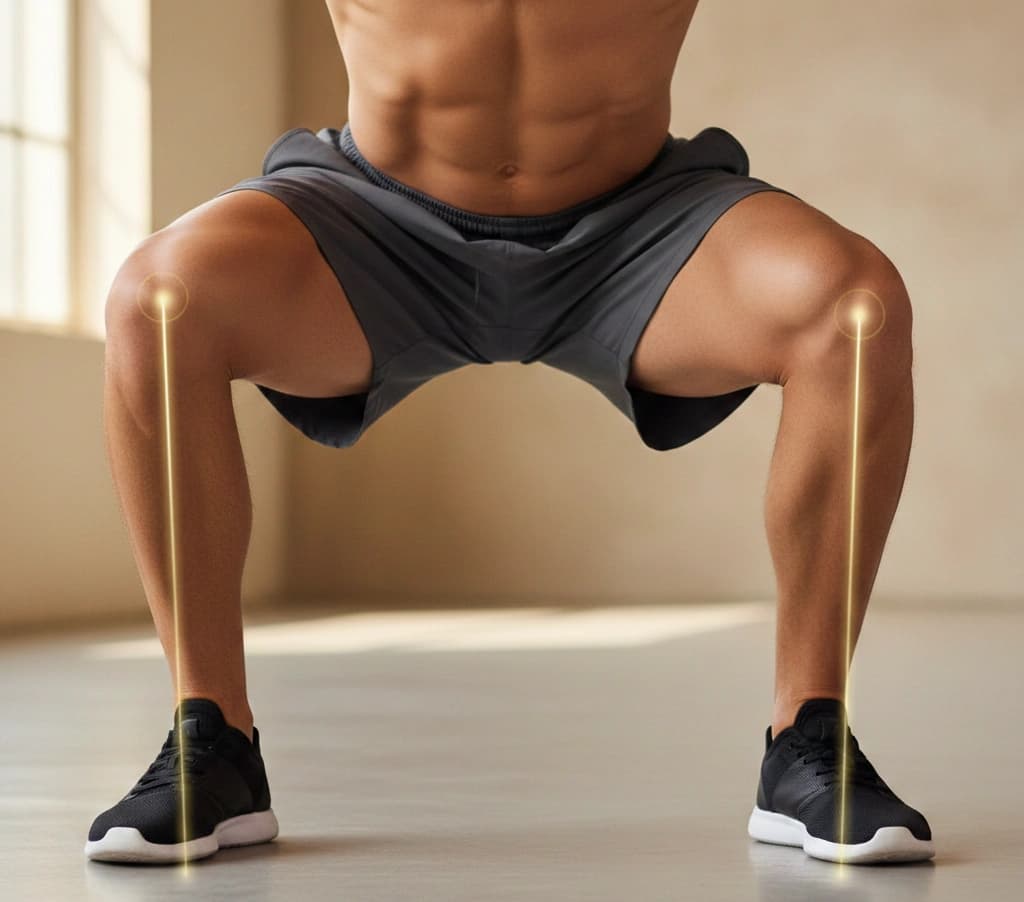
Knee valgus occurs when the knees collapse inward toward the midline of the body, creating a visible angle where the lower legs angle outward from the knee joint. In a healthy alignment, the knee tracks directly over the second or third toe during bending and weight-bearing movements. When valgus is present, the knee drifts medially (inward), placing asymmetric stress on the joint structures.
Anatomy and Biomechanics
Understanding which muscles and structures are involved clarifies why knock knees develop and how to fix them:
-
Gluteus medius: This is the primary hip abductor, located on the outer surface of the pelvis. It controls femoral position during single-leg stance and prevents the thigh from rotating inward. Weakness in the gluteus medius is the single most common cause of dynamic knee valgus—the knee caving that occurs during movement.
-
Gluteus maximus: The largest muscle in the body, responsible for hip extension and external rotation. When the glute max is weak or underactive, the femur tends to internally rotate under load, pulling the knee inward.
-
Hip external rotators: The deep six external rotators (piriformis, obturator internus and externus, gemelli, and quadratus femoris) work alongside the gluteals to control femoral rotation. Poor activation of these muscles allows the femur to rotate inward during squatting and landing.
-
Adductors: The inner thigh muscles (adductor longus, brevis, magnus, and gracilis) pull the thigh toward the midline. When these muscles are tight or overactive relative to the abductors, they overpower the glutes and contribute to the inward collapse.
-
Tensor fasciae latae (TFL) and IT band: The TFL is a hip flexor and internal rotator on the outer hip. When it becomes tight and dominant over the gluteus medius, it contributes to internal rotation and valgus positioning.
-
Tibialis posterior and foot arch: The tibialis posterior supports the medial arch of the foot. When this muscle is weak—as in flat feet (pes planus)—the arch collapses, the ankle rolls inward (pronation), and this chain reaction drives the knee into valgus from below.
Static vs. Dynamic Valgus
It is important to distinguish between two types:
-
Structural valgus: A fixed bony alignment issue where the angle between the femur and tibia is abnormally large. This is relatively rare in adults and may require orthopedic evaluation. It is not correctable through exercise alone.
-
Dynamic (functional) valgus: The knee caves inward only during movement—squatting, jumping, running, or single-leg balance. This is far more common and results from muscular weakness, tightness, and poor motor control. This is the type that responds to corrective exercise, and it is the focus of this guide.
Self-Assessment: Do You Have Knee Valgus?
Before starting a corrective program, it helps to confirm whether knee valgus is actually present and to what degree. Here are three simple tests you can perform at home:
1. Standing Alignment Check
- Stand barefoot with your feet together and your legs straight.
- Look in a mirror or have someone observe from the front.
- What to look for: If your knees touch but your ankles do not, you have some degree of static valgus. A gap of more than 8 cm (roughly 3 inches) between the ankles with the knees touching suggests more significant valgus alignment.
2. Bodyweight Squat Test
- Stand with feet shoulder-width apart, toes pointing slightly outward.
- Perform 5-10 slow, full-depth bodyweight squats.
- Film yourself from the front, or have someone observe.
- What to look for: Watch the knees as you descend into the bottom of the squat. If one or both knees drift inward past the line of the big toe, that indicates dynamic valgus. Pay particular attention to the transition from the bottom back up—this is where valgus is most pronounced.
3. Single-Leg Squat Test
- Stand on one leg with the other leg extended in front of you.
- Slowly lower into a quarter to half squat on the standing leg.
- Film from the front or have someone watch your knee.
- What to look for: If the standing knee collapses inward, the hip drops on the opposite side (Trendelenburg sign), or you struggle to maintain balance, this strongly indicates gluteus medius weakness and dynamic valgus. This is the most revealing test because single-leg demands expose weaknesses that bilateral stance can mask.
Note: Some degree of knee movement during squatting is normal. The concern is when the knee consistently and significantly drifts inward, especially under load or fatigue.
Common Causes of Knock Knees
1. Weak Gluteus Medius
This is the most frequent cause in adults who exercise. The gluteus medius is the primary muscle preventing the thigh from adducting and internally rotating during single-leg activities. In most people, it is chronically underactivated due to prolonged sitting and a lack of targeted hip abduction training. When the gluteus medius fails to fire adequately during squats, lunges, or landing, the femur rotates inward and the knee collapses.
2. Tight Adductors
The adductors (inner thigh muscles) oppose the gluteus medius. When they are chronically tight—common in people who sit with legs together for extended periods—they pull the femur into adduction and internal rotation, overpowering the weakened abductors and driving the knee inward.
3. Flat Feet (Pes Planus)
Foot arch collapse creates a chain reaction upward. When the medial arch falls, the ankle rolls inward (excessive pronation), the tibia internally rotates, and this mechanical cascade forces the knee into valgus. Many people with knock knees also have flat feet, and addressing foot strength is an essential part of correction.
4. Hip Internal Rotation Dominance
Tight hip internal rotators—particularly the TFL and anterior fibers of the gluteus medius—combined with weak external rotators create a pattern where the femur defaults to an internally rotated position. This rotational imbalance is a major contributor to the inward knee collapse seen during squats.
5. Ankle Dorsiflexion Restriction
Limited ankle mobility forces compensations during squatting. When the ankle cannot dorsiflex sufficiently (typically less than 35 degrees), the body compensates by pronating the foot and internally rotating the tibia, both of which contribute to knee valgus.
6. Poor Neuromuscular Control
Even when adequate strength is present, some athletes lack the motor control to maintain proper knee alignment under load or fatigue. This is particularly evident in dynamic movements like jump landings, where the nervous system defaults to valgus patterns if correct alignment has not been deliberately trained.
How Knee Valgus Affects Calisthenics Performance
Knee valgus is not just a cosmetic concern—it directly impacts your ability to perform fundamental bodyweight movements safely and effectively.
Squats and Pistol Squats
Valgus collapse during squats reduces your ability to generate force efficiently. The knee is designed to flex and extend in the sagittal plane; lateral forces from valgus create shear stress on the joint. For pistol squats, this is magnified: the entire body weight is on one leg, and without strong hip abduction control, the knee will cave dramatically, limiting depth and increasing injury risk.
Jump Landings
Landing from box jumps, broad jumps, or plyometric exercises with knee valgus is one of the highest-risk scenarios for ACL injury. Research consistently shows that valgus knee position during landing is a primary mechanism for non-contact ACL tears, particularly in athletes who lack neuromuscular control.
Lunges and Step-Ups
Any single-leg exercise exposes valgus patterns. Bulgarian split squats, walking lunges, and step-ups all require hip abduction strength to prevent the knee from caving inward. Poor alignment during these movements reduces the training stimulus to the target muscles and increases stress on the medial knee structures.
Injury Risk
Chronic knee valgus is associated with:
- ACL tears: Valgus combined with internal rotation is the primary mechanism for non-contact ACL injuries.
- Meniscus damage: Asymmetric loading on the medial compartment accelerates meniscal wear.
- Patellofemoral pain syndrome: Altered tracking of the kneecap due to valgus alignment causes anterior knee pain.
- IT band syndrome: The iliotibial band becomes stressed when the knee drifts inward under load.
- Medial collateral ligament (MCL) strain: Repetitive valgus stress stretches the MCL over time.
Corrective Exercises for Knock Knees
The following exercises target the gluteus medius, gluteus maximus, hip external rotators, and foot intrinsic muscles. Start with the easier variations and progress as strength and control improve.
1. Clamshells
The clamshell is the foundational exercise for gluteus medius activation. It isolates the hip abductors in a position that minimizes TFL compensation.
How to perform:
- Lie on your side with hips and knees bent to approximately 45 degrees, feet together.
- Keep your feet stacked and your core engaged.
- Without rolling your pelvis backward, lift your top knee as high as possible while keeping your feet together.
- Hold the top position for 2 seconds, squeezing the outer hip.
- Slowly lower the knee back down.
- Perform 3 sets of 15-20 repetitions per side.
Progression: Place a mini resistance band just above the knees to increase resistance. Advance to hip-lifted clamshells (bridge position) for greater challenge.
2. Lateral Band Walks
This exercise trains the gluteus medius in a functional standing position and teaches the hips to resist adduction during movement.
How to perform:
- Place a mini resistance band around your legs just above the ankles (or above the knees for a lighter variation).
- Stand with feet hip-width apart, knees slightly bent, hips hinged slightly back.
- Keeping tension on the band throughout, step laterally with the lead foot, then follow with the trailing foot. Do not let your feet come together.
- Maintain a slight squat position and keep your toes pointing forward—do not let the feet turn outward.
- Perform 3 sets of 15 steps in each direction.
Key cue: Push through the heel of the lead foot and feel the burn on the outside of the hip. If you feel it primarily in the TFL (front of the outer hip), sit your hips back further.
3. Single-Leg Glute Bridges
This exercise strengthens the glute max and medius in hip extension while demanding single-leg pelvic stability.
How to perform:
- Lie on your back with knees bent and feet flat on the floor, hip-width apart.
- Extend one leg straight out or hold the knee toward your chest.
- Press through the heel of the working leg and drive your hips upward until your body forms a straight line from shoulder to knee.
- At the top, focus on squeezing the glute and keeping your pelvis level—do not let the unsupported side drop.
- Hold for 2-3 seconds, then lower slowly.
- Perform 3 sets of 10-12 repetitions per side.
Progression: Place the working foot on an elevated surface to increase range of motion, or add a mini band above the knees.
4. Side-Lying Hip Abduction
A more challenging gluteus medius isolation exercise than the clamshell because the leg is straight, increasing the lever arm.
How to perform:
- Lie on your side with the bottom leg bent for stability and the top leg straight.
- Slightly externally rotate the top leg so the toes point slightly downward (this targets the gluteus medius and reduces TFL involvement).
- Lift the top leg to approximately 30-40 degrees, leading with the heel.
- Hold for 2 seconds at the top, then lower with control.
- Perform 3 sets of 15 repetitions per side.
Key cue: If you feel the exercise in the front of your hip rather than the side, rotate the leg slightly more and reduce the range of motion.
5. Banded Squat with Valgus Resistance
This exercise retrains the motor pattern of keeping the knees out during squatting—directly addressing the movement fault.
How to perform:
- Place a mini resistance band just above the knees.
- Stand with feet shoulder-width apart, toes slightly turned out.
- Push your knees out against the band as you descend into a full squat.
- Focus on tracking the knees over the second and third toes throughout the entire movement.
- Drive back up by pressing through the heels and maintaining outward knee pressure.
- Perform 3 sets of 12-15 repetitions.
Key cue: The band is providing a valgus force—your job is to resist it. This teaches the glutes to activate automatically during squatting.
6. Step-Downs with Knee Control
This functional exercise trains single-leg stability and knee alignment in a pattern that transfers directly to pistol squats and lunges.
How to perform:
- Stand on a low step or box (15-20 cm / 6-8 inches) on one leg.
- Slowly lower the opposite foot toward the ground by bending the standing knee.
- Watch your standing knee in a mirror—it must track directly over your toes without caving inward.
- Lightly tap the heel of the lowering foot on the ground, then drive back up.
- Perform 3 sets of 10 repetitions per side.
Key cue: This exercise is about control, not speed. If the knee caves at any point, reduce the step height or slow down further.
7. Short Foot Exercise (Foot Arch Activation)
This targets the intrinsic foot muscles that support the medial arch, addressing the bottom-up component of valgus.
How to perform:
- Sit in a chair with feet flat on the floor.
- Without curling your toes, try to shorten your foot by drawing the ball of the foot toward the heel. The arch should visibly rise.
- Hold for 5 seconds, then relax.
- Perform 3 sets of 10 repetitions per foot.
- Once comfortable seated, progress to standing, then to single-leg stance.
Key cue: Think of doming the arch upward while keeping the toes flat on the ground. This is subtle—the movement is small but the activation should be felt along the inside of the foot.
Stretches for Knock Knees
Tight muscles contribute to the valgus pattern. These stretches address the most common contributors.
1. Adductor Stretch (Butterfly Stretch)
Tight adductors pull the thigh inward and contribute to knee valgus.
How to perform:
- Sit on the floor with your back straight.
- Bring the soles of your feet together and let your knees drop outward.
- Hold your feet with your hands and gently press your knees toward the floor using your elbows.
- Keep your spine tall—do not round forward.
- Hold for 45-60 seconds.
- Perform 2-3 sets.
Variation: For a deeper stretch, move your feet closer to your body.
2. Adductor Stretch (Wide-Stance Standing)
This targets the adductors in a lengthened position that mimics the demands of squatting.
How to perform:
- Stand with feet significantly wider than shoulder-width, toes pointing slightly outward.
- Shift your weight to one side, bending that knee and straightening the opposite leg.
- You should feel a deep stretch along the inner thigh of the straight leg.
- Hold for 30-45 seconds per side.
- Perform 2-3 sets per side.
3. TFL and IT Band Stretch
Tight TFL and IT band contribute to femoral internal rotation and lateral knee stress.
How to perform:
- Stand and cross the leg you want to stretch behind the other leg.
- Lean your hips away from the crossed leg (if the right leg is crossed behind, lean your hips to the right).
- Raise the arm on the same side overhead and lean further to increase the stretch along the outer hip and thigh.
- Hold for 30-45 seconds per side.
- Perform 2-3 sets per side.
4. Hip Flexor and TFL Stretch (Half-Kneeling)
This stretch targets the hip flexors and TFL, which contribute to femoral internal rotation when tight.
How to perform:
- Kneel on one knee with the other foot forward, both knees at 90 degrees.
- Tuck your pelvis under (posterior pelvic tilt) to flatten your lower back.
- Shift your weight slightly forward until you feel a stretch in the front of the kneeling hip.
- To target the TFL specifically, lean slightly away from the kneeling side.
- Hold for 30-45 seconds per side.
- Perform 2-3 sets per side.
5. Calf and Ankle Dorsiflexion Stretch (Wall Stretch)
Improving ankle mobility reduces the compensatory pronation and tibial rotation that contributes to valgus.
How to perform:
- Stand facing a wall with one foot forward, toes about 10 cm (4 inches) from the wall.
- Bend the front knee toward the wall, keeping the heel on the ground.
- Try to touch the wall with your knee while maintaining a flat heel.
- Hold for 30 seconds, then switch sides.
- Perform 2-3 sets per side.
Assessment: If you cannot touch the wall with your knee at 10 cm distance, ankle dorsiflexion is limited and contributing to your valgus pattern.
Programming: 4-Week Corrective Routine
Consistency is key. This program progresses from activation and mobility (weeks 1-2) to strengthening and integration (weeks 3-4). Perform the routine 4-5 days per week.
Weeks 1-2: Activation and Mobility
Goal: Activate the gluteus medius, improve adductor flexibility, and build foot arch control.
Daily routine (15-20 minutes):
- Calf/ankle wall stretch: 30 seconds x 2 per side
- Butterfly adductor stretch: 45 seconds x 2
- TFL/IT band stretch: 30 seconds x 2 per side
- Half-kneeling hip flexor stretch: 30 seconds x 2 per side
- Clamshells (no band): 3 x 20 per side
- Side-lying hip abduction: 3 x 15 per side
- Short foot exercise (seated): 3 x 10 per foot
- Single-leg glute bridges: 3 x 10 per side
Weeks 3-4: Strengthening and Integration
Goal: Build hip abductor strength under resistance and retrain squat and single-leg patterns.
Daily routine (20-25 minutes):
- Calf/ankle wall stretch: 30 seconds x 2 per side
- Wide-stance adductor stretch: 30 seconds x 2 per side
- TFL/IT band stretch: 30 seconds x 2 per side
- Clamshells (with mini band): 3 x 15 per side
- Lateral band walks: 3 x 15 steps each direction
- Single-leg glute bridges: 3 x 12 per side
- Banded squat with valgus resistance: 3 x 12
- Step-downs with knee control: 3 x 10 per side
- Short foot exercise (standing, single-leg): 3 x 10 per foot
Beyond Week 4
Once knee alignment visibly improves during squatting and single-leg stance:
- Continue lateral band walks and clamshells as a warm-up before leg training.
- Incorporate banded squats 2-3 times per week as maintenance.
- Focus on proper knee tracking during all squatting, lunging, and landing movements.
- Practice pistol squat progressions with a mirror to monitor knee alignment.
- Reassess every 4 weeks using the single-leg squat test.
Connection to Flat Feet and Hip Alignment
Knock knees rarely exist in isolation. They are part of a kinetic chain that includes the foot below and the hip above. Understanding these connections helps you address the root causes rather than just the symptom.
Flat Feet and Knock Knees
Flat feet and knock knees frequently occur together. When the medial arch collapses, the ankle pronates excessively, the tibia internally rotates, and the knee is driven into valgus. Correcting flat feet through arch strengthening (short foot exercise, toe yoga, barefoot training) is often a necessary component of fixing knock knees. If you have significant arch collapse, consider reading our guide on how to fix flat feet alongside this program.
Hip Alignment and Anterior Pelvic Tilt
Anterior pelvic tilt increases femoral internal rotation, which worsens knee valgus. If you notice that your lower back is excessively arched and your pelvis tilts forward, addressing this posture will support your knee correction. Hip flexor tightness and weak glutes contribute to both conditions, so many of the exercises in this guide also benefit pelvic alignment. For a comprehensive approach, see our guide on how to fix anterior pelvic tilt.
The Full Chain
A comprehensive lower-body alignment approach addresses all three levels:
- Foot: Strengthen the arch, reduce excessive pronation.
- Hip: Strengthen the abductors and external rotators, stretch the adductors and TFL.
- Knee: Retrain movement patterns with banded squats, step-downs, and single-leg work.
Fixing only one level often produces incomplete results because the compensation simply shifts elsewhere in the chain.
When to See a Doctor
While most cases of functional knee valgus respond to conservative treatment, certain presentations require medical evaluation:
- Structural valgus: If your knees visibly angle inward even when fully relaxed and non-weight-bearing, the issue may be skeletal rather than muscular. An orthopedic evaluation with standing X-rays can determine the tibiofemoral angle.
- Pain: Persistent knee pain—especially on the medial side, behind the kneecap, or along the IT band—that does not improve with corrective exercise warrants professional assessment.
- Sudden onset: Valgus alignment that appears suddenly after an injury may indicate ligament damage requiring imaging.
- No improvement after 6-8 weeks: If a structured corrective program produces no visible improvement in knee alignment, a physical therapist can perform a detailed assessment and identify contributing factors you may have missed.
- Asymmetric presentation: Significant valgus on one side only may indicate a structural issue, previous injury, or nerve-related muscle weakness that requires targeted evaluation.
A physical therapist or sports medicine specialist can perform gait analysis, assess hip and ankle mobility, evaluate muscle activation patterns, and develop an individualized corrective program if the general approach outlined here is insufficient.
Conclusion
Knock knees (knee valgus) is a common but correctable alignment issue for most calisthenics athletes. The root causes are typically weak hip abductors—especially the gluteus medius—tight adductors, and often poor foot arch control. By systematically strengthening the glutes through clamshells, lateral band walks, and single-leg work—while releasing tight adductors and improving ankle mobility—you can restore proper knee alignment and eliminate the inward collapse that compromises your training.
Start with the 4-week corrective routine outlined above, be consistent, and pay attention to your knee alignment during every squat, lunge, and landing. Most people see meaningful improvement within 4-8 weeks of dedicated work. If your knees still cave despite consistent effort, or if you experience persistent pain, seek evaluation from a qualified physical therapist or sports medicine professional. Proper knee alignment is essential for safe, effective calisthenics training—invest in it now.
FAQ
How long does it take to fix knock knees?
Most people with functional (non-structural) knee valgus see noticeable improvement in knee tracking within 4-8 weeks of consistent corrective exercise. Full correction, including automatic maintenance of alignment during dynamic movements, typically takes 3-6 months depending on severity and training consistency.
Can I still train calisthenics with knock knees?
Yes, but you should modify your training. Reduce loading on exercises where valgus is pronounced (heavy squats, deep pistol squats) until alignment improves. Use banded squats and lighter variations to retrain the pattern. Prioritize your corrective routine alongside regular training and monitor knee position with a mirror or video during all lower-body work.
Are knock knees the same as knee valgus?
Knock knees is the common term for what medical professionals call genu valgum or knee valgus. They refer to the same condition—an inward angulation of the knees. Dynamic valgus specifically refers to the knee caving that occurs during movement, while structural valgus refers to a fixed bony alignment.
Can flat feet cause knock knees?
Yes. Flat feet (pes planus) create a chain reaction: the collapsed arch causes excessive ankle pronation, which internally rotates the tibia, which drives the knee into valgus. Addressing foot arch strength is often a necessary component of correcting knock knees.
Do I need orthotics for knock knees?
Orthotics may help as a temporary support while you build foot and hip strength, but they are not a standalone solution for functional valgus. The priority should be strengthening the gluteus medius, hip external rotators, and foot intrinsic muscles. If you have significant structural flat feet, a healthcare provider can advise whether orthotics would benefit your specific situation.