SI Joint Pain Relief: Bodyweight Exercises & Stretches That Work
A deep, nagging ache on one side of your lower back, just above the buttock. Pain that flares when you stand up from a chair, climb stairs, or roll over in bed. If this sounds like your experience, you may be dealing with sacroiliac (SI) joint dysfunction—a surprisingly common condition that affects an estimated 15-30% of people with non-specific lower back pain. Unlike sciatica, which involves nerve compression and radiating leg pain, SI joint pain originates from the joint itself and responds to a different set of exercises.
This guide covers everything you need to know about managing SI joint pain through bodyweight exercises and stretches: understanding the anatomy, identifying whether your pain is truly SI joint-related, and following a structured protocol to stabilize the joint, reduce pain, and prevent recurrence.
What Is the SI Joint? Anatomy and Function
The sacroiliac joints are two large joints located where the sacrum (the triangular bone at the base of your spine) meets the ilium (the large pelvic bones) on each side. You can locate them by finding the two dimples on either side of your lower back, just above your buttocks.
Structure
Unlike most joints in your body, the SI joints are designed for stability rather than mobility. They feature:
- Irregular, interlocking surfaces — the sacrum and ilium fit together like puzzle pieces
- Extremely strong ligaments — some of the strongest in the body, including the anterior sacroiliac, posterior sacroiliac, interosseous, sacrotuberous, and sacrospinous ligaments
- Minimal movement — only 2-4 degrees of rotation and 1-2mm of translation under normal conditions
Function
Despite their limited motion, the SI joints serve critical functions:
- Load transfer — they transmit the weight of your upper body to your legs during standing, walking, and running
- Shock absorption — they absorb ground reaction forces during impact activities
- Force closure — surrounding muscles actively compress the joint for stability during movement
The muscles that directly influence SI joint stability include the gluteus maximus, piriformis, biceps femoris (long head), erector spinae, multifidus, transverse abdominis, and the pelvic floor muscles. Understanding this muscle system is key to effective rehabilitation.
For a deeper look at joint structure and function, explore our free Anatomy Course.
SI Joint Pain vs. Sciatica vs. Lower Back Pain
One of the biggest challenges with SI joint pain is distinguishing it from other conditions that cause similar symptoms. Here's how to tell them apart:
SI Joint Dysfunction
- Location: Pain concentrated around one SI joint (the "dimple" area), may refer to the buttock, groin, or back of the thigh
- Pattern: Rarely radiates below the knee
- Aggravating factors: Transitional movements (sit-to-stand, rolling in bed), single-leg loading (stairs, lunges), prolonged sitting or standing on one side
- Relieving factors: Changing positions frequently, using an SI belt, bilateral loading
Sciatica
- Location: Radiates from the lower back through the buttock and down the leg, often below the knee
- Pattern: Follows the sciatic nerve pathway, may include numbness and tingling
- Aggravating factors: Sitting, forward bending, coughing, sneezing
- Relieving factors: Walking, standing, specific positional changes
For more on sciatica management, see our sciatica relief guide.
Non-Specific Lower Back Pain
- Location: Generalized across the lower back, often bilateral
- Pattern: Diffuse aching, may include muscle spasms
- Aggravating factors: Prolonged positions, heavy lifting, repetitive bending
- Relieving factors: Movement, gentle stretching, heat
For desk-related lower back pain, see our lower back pain from sitting guide.
Self-Assessment Tests for SI Joint Pain
While a definitive diagnosis requires a healthcare professional, these provocation tests can help you identify whether your SI joint may be the source of your pain. A positive result means the test reproduces your familiar pain. If three or more of these tests are positive, there is a high probability of SI joint involvement.
1. FABER Test (Patrick's Test)
- Lie on your back with both legs straight
- Place the ankle of your affected side on the opposite knee (figure-4 position)
- Gently let the bent knee fall outward toward the floor
- Apply gentle downward pressure on the bent knee while stabilizing the opposite hip
Positive result: Reproduces your familiar pain in the SI joint area
2. SI Compression Test
- Lie on your side with your affected side up
- Have a partner place both hands on the top of your iliac crest (hip bone)
- Apply a firm downward force, compressing the SI joints together
Positive result: Reproduces pain at the SI joint
3. SI Distraction Test
- Lie on your back
- Have a partner place their hands on the front of both iliac crests (the bony points at the front of your hips)
- Apply an outward force, pushing the iliac crests apart
Positive result: Reproduces pain at the SI joint
4. Thigh Thrust Test
- Lie on your back with your affected hip flexed to 90 degrees
- Have a partner apply a downward force through the thigh toward the table
- This transmits a posterior shearing force through the SI joint
Positive result: Reproduces your SI joint pain
5. Gaenslen's Test
- Lie on your back at the edge of a table or bed
- Pull one knee to your chest while letting the other leg hang off the edge
- The hanging leg creates an extension force on the SI joint
Positive result: Reproduces pain on the side of the hanging leg
Important: These tests are screening tools, not definitive diagnoses. If you suspect SI joint dysfunction, consult a healthcare professional for a proper evaluation. A single positive test is not sufficient—research shows that a cluster of three or more positive provocation tests provides the most reliable clinical diagnosis.
Common Causes of SI Joint Pain
Understanding why your SI joint is painful helps guide the most effective treatment approach.
Hypermobility (Too Much Movement)
The most common cause, especially in younger individuals and women. When the ligaments that stabilize the SI joint become lax, the joint moves more than it should, causing inflammation and pain.
Risk factors:
- Pregnancy and postpartum (relaxin hormone loosens ligaments)
- Generalized joint hypermobility
- Previous pelvic or lower back injury
- Repeated high-impact loading
Hypomobility (Too Little Movement)
The joint becomes stiff, often due to degenerative changes or prolonged immobility. The surrounding tissues compensate, leading to pain.
Risk factors:
- Age-related degeneration
- Ankylosing spondylitis or other inflammatory conditions
- Prolonged immobility
- Previous fusion surgery
Asymmetric Loading
Repeatedly loading one side more than the other creates shearing forces across the SI joint.
Common causes:
- Unilateral sports (golf, tennis, baseball)
- Always carrying bags on one shoulder
- Leg length discrepancy
- Scoliosis
- Favoring one leg after injury
Muscle Imbalances
Weakness or tightness in muscles that support the SI joint leads to altered force distribution.
Key imbalances:
- Weak gluteus maximus — reduces force closure of the SI joint
- Weak deep core (transverse abdominis, multifidus) — reduces active stabilization
- Tight hip flexors — increases anterior pelvic tilt and SI joint stress
- Tight piriformis — directly attaches to the sacrum and can distort SI joint mechanics
- Weak or overactive pelvic floor — affects sacral stability
Pregnancy
Hormonal changes (particularly relaxin) combined with weight gain, postural shifts, and altered gait mechanics make the SI joint especially vulnerable during and after pregnancy.
Stabilization Exercises for SI Joint Pain
The primary treatment for SI joint dysfunction—particularly hypermobility-related pain—is stabilization. These exercises build the muscular support system around the joint to control excessive movement.
Phase 1: Foundation Stability (Weeks 1-2)
Start with these exercises during the acute or early phase. Focus on activating the correct muscles with minimal load.
1. Transverse Abdominis Activation
The transverse abdominis (TrA) is the deepest abdominal muscle and acts like a natural corset, compressing the SI joints for stability.
How to perform:
- Lie on your back with knees bent and feet flat on the floor
- Place your fingers just inside your hip bones (anterior superior iliac spines)
- Gently draw your lower abdomen inward, as if pulling your belly button toward your spine
- You should feel a subtle tightening under your fingertips
- Hold while breathing normally
Duration: Hold for 10 seconds, 10 repetitions, 3 times daily
Key points:
- This is a gentle contraction—about 30% of maximum effort
- Your pelvis and spine should not move
- Do not hold your breath
- Practice engaging TrA during all subsequent exercises
2. Supine Pelvic Floor Engagement
The pelvic floor muscles attach directly to the sacrum and coccyx, contributing to SI joint stability.
How to perform:
- Lie on your back with knees bent
- Gently contract your pelvic floor muscles (imagine stopping the flow of urine)
- Combine with transverse abdominis activation
- Hold while breathing normally
Duration: Hold for 10 seconds, 10 repetitions, 2-3 times daily
Key points:
- Avoid bearing down—the contraction should lift inward and upward
- Do not squeeze your glutes or inner thighs
- Coordinate with TrA activation for maximum SI joint compression
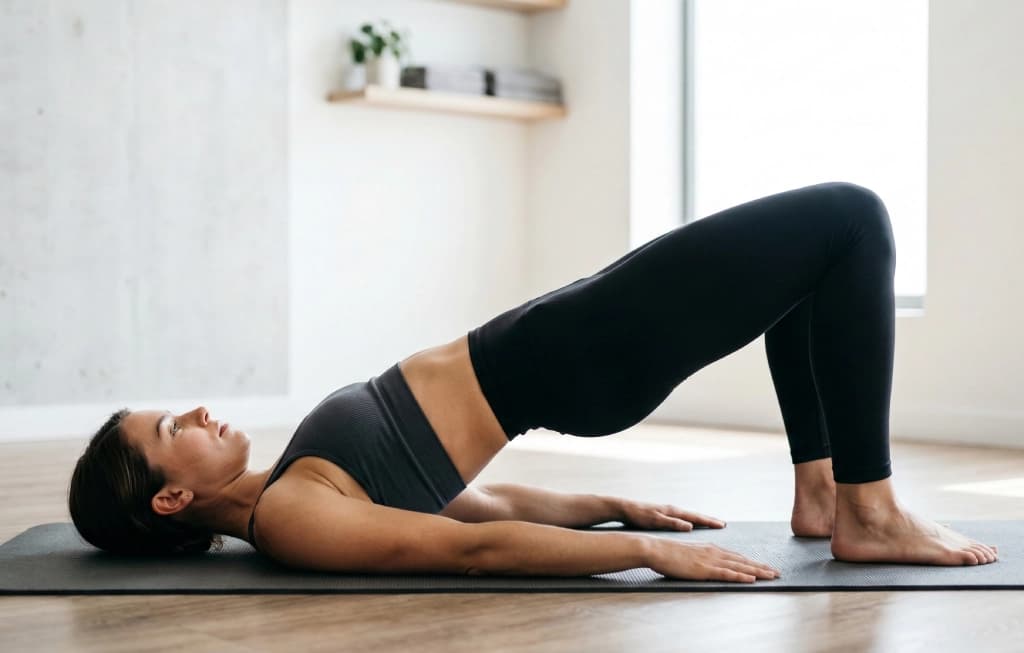
3. Glute Bridge
Strengthens the gluteus maximus, the primary force closure muscle of the SI joint.
How to perform:
- Lie on your back with knees bent, feet flat and hip-width apart
- Engage your TrA and pelvic floor
- Squeeze your glutes and lift your hips until your body forms a straight line from shoulders to knees
- Hold at the top for 3-5 seconds
- Lower slowly with control
Reps: 10-12 repetitions, 3 sets
Key points:
- Drive through your heels
- Do not hyperextend your lower back at the top
- Keep the movement symmetrical—if one side feels different, reduce range
- Avoid the movement if it reproduces your SI joint pain
4. Supine Marching
Builds stability through controlled single-leg loading while the spine stays supported.
How to perform:
- Lie on your back with knees bent, feet flat on the floor
- Engage your TrA and pelvic floor
- Slowly lift one foot 2-3 inches off the floor, keeping your knee bent
- Hold for 3 seconds, then lower with control
- Repeat on the other side
Reps: 10 per side, 2-3 sets
Key points:
- Your pelvis should remain completely still—no rocking or shifting
- Place your hands on your hip bones to monitor for unwanted movement
- If your pelvis rocks, you're lifting too high or your core isn't engaged enough
Phase 2: Progressive Stabilization (Weeks 2-4)
As pain decreases and you develop better muscle control, progress to these more challenging exercises.
5. Bird Dog
Develops spinal and pelvic stability through contralateral limb loading.
How to perform:
- Start on hands and knees with wrists under shoulders, knees under hips
- Engage your TrA and maintain a neutral spine
- Slowly extend your right arm forward and left leg backward
- Keep your hips level—imagine balancing a glass of water on your lower back
- Hold for 5 seconds, return to start, and switch sides
Reps: 8-10 per side, 3 sets
Key points:
- Maintain a neutral spine throughout—no sagging or arching
- The challenge is keeping your pelvis stable, not how high you lift
- If this aggravates your SI joint, try extending just the arm or just the leg first
6. Dead Bug
Builds anterior core stability with minimal SI joint stress.
How to perform:
- Lie on your back with arms extended toward the ceiling
- Lift your legs to tabletop position (hips and knees at 90 degrees)
- Press your lower back firmly into the floor
- Slowly extend your right arm overhead and left leg straight out, hovering above the floor
- Return to start and repeat with opposite limbs
Reps: 8-10 per side, 3 sets
Key points:
- Your lower back must remain pressed into the floor the entire time
- If your back arches, reduce the range of motion
- Exhale as you extend, inhale as you return
7. Side-Lying Hip Abduction
Strengthens the gluteus medius, which stabilizes the pelvis during single-leg activities.
How to perform:
- Lie on your side with legs straight, body in a straight line
- Engage your core to prevent your torso from rolling
- Raise your top leg about 30-45 degrees, keeping it straight
- Pause at the top, then lower with control
Reps: 12-15 per side, 3 sets
Key points:
- Keep your toe pointed slightly forward or toward the floor (not up)
- Don't let your body roll backward
- Avoid hiking your hip—the movement comes from the hip joint
8. Clamshell
Targets the deep hip external rotators to improve pelvic stability.
How to perform:
- Lie on your side with knees bent to about 45 degrees, feet together
- Keep your hips stacked and core engaged
- Raise your top knee as high as possible without rotating your pelvis
- Pause at the top, then lower with control
Reps: 15-20 per side, 2-3 sets
Key points:
- Place your hand on your top hip to ensure it doesn't roll backward
- The range of motion may be small—that's okay
- Focus on feeling the contraction in the side of your buttock
Phase 3: Functional Stability (Weeks 4-8+)
These exercises challenge your SI joint stability in more demanding positions that mimic daily activities and training.
9. Pallof Press (Bodyweight Variation)
Builds anti-rotation core stability, which is essential for protecting the SI joint during asymmetric movements.
How to perform:
- Stand in a split stance with one foot forward
- Clasp your hands together at your chest
- Brace your core and press your hands straight out in front of you
- Hold for 5 seconds, resisting any rotational pull
- Return hands to chest and repeat
Reps: 10 per side, 3 sets
Progression: Perform in a tall kneeling position, then half-kneeling, then single-leg stance for increasing challenge.
10. Single-Leg Glute Bridge
Progresses the standard glute bridge to address single-leg stability.
How to perform:
- Lie on your back with knees bent, feet flat
- Extend one leg straight out or hold it at tabletop position
- Engage your core and glutes, then lift your hips
- Hold at the top for 3 seconds
- Lower with control
Reps: 8-10 per side, 3 sets
Key points:
- Keep your hips level—don't let the unsupported side drop
- If this reproduces SI pain, return to bilateral bridges for longer
- Drive through the heel of your working leg
11. Wall Sit
Builds isometric lower body strength while maintaining neutral pelvic alignment.
How to perform:
- Stand with your back flat against a wall
- Slide down until your thighs are parallel to the floor (or as low as comfortable)
- Keep your feet hip-width apart and knees over ankles
- Press your lower back into the wall
- Hold while breathing normally
Duration: 20-45 seconds, 3 sets
Key points:
- Keep weight distributed evenly through both feet
- Maintain neutral pelvic position—don't tilt forward or backward
- If one-sided pain occurs, check that you're loading both legs equally
12. Step-Up (Low Step)
Introduces controlled single-leg loading in a functional pattern.
How to perform:
- Stand facing a low step (6-8 inches to start)
- Place your entire foot on the step
- Engage your core and press through the working leg to step up
- Control the descent—don't drop down
- Complete all reps on one side before switching
Reps: 8-10 per side, 2-3 sets
Key points:
- Keep your pelvis level throughout
- Drive through the heel, not the toes
- Use a wall or rail for balance if needed
- Progress step height gradually as stability improves
Stretches for SI Joint Pain
While stabilization is the priority, targeted stretching of tight muscles that contribute to SI joint dysfunction is an important complement. Stretch after stabilization exercises, not before.
Piriformis Stretch
The piriformis attaches directly to the sacrum and can contribute to SI joint dysfunction when tight.
Supine Figure-4 Stretch:
- Lie on your back with both knees bent
- Cross the ankle of your affected side over the opposite knee
- Reach through and grasp behind your supporting thigh
- Gently pull toward your chest until you feel a deep stretch in the buttock
Duration: 30-60 seconds per side, 2-3 times
Hip Flexor Stretch
Tight hip flexors increase anterior pelvic tilt, which places additional stress on the SI joint.
Half-Kneeling Hip Flexor Stretch:
- Kneel on the side you want to stretch, opposite foot forward
- Tuck your pelvis under (posterior pelvic tilt) and engage your core
- Shift your weight forward slightly until you feel a stretch in the front of your hip
- For a deeper stretch, raise the arm on the kneeling side overhead
Duration: 30-60 seconds per side, 2-3 times
For more on releasing tight hip flexors, see our hip flexor pain release guide.
Adductor Stretch
Tight adductors can create asymmetric pelvic forces that stress the SI joint.
Supine Butterfly Stretch:
- Lie on your back with the soles of your feet together, knees falling outward
- Allow gravity to gently open your hips
- Place your hands on your inner thighs for gentle guidance—do not force
Duration: 60-90 seconds, 2 times
Standing Adductor Stretch:
- Stand with feet wider than shoulder-width, toes pointing forward
- Shift your weight to one side, bending that knee
- Keep the opposite leg straight with the foot flat on the floor
- You should feel a stretch along the inner thigh of the straight leg
Duration: 30-45 seconds per side, 2-3 times
Gentle Lumbar Rotation Stretch
Mobilizes the lumbar spine and stretches tissues around the SI joint.
How to perform:
- Lie on your back with both knees bent, feet flat on the floor
- Keep your shoulders flat against the floor
- Slowly let both knees fall to one side
- Go only as far as comfortable—this should not reproduce your SI pain
- Hold, return to center, repeat on the other side
Duration: 20-30 seconds per side, 5-6 repetitions total
Key point: If this movement aggravates your SI joint, skip it. Rotation can be provocative for some SI joint conditions.
Child's Pose with SI Joint Modification
A gentle resting position that can relieve SI joint tension when modified properly.
How to perform:
- Kneel on the floor with big toes touching
- Spread your knees apart to approximately hip-width (wider than standard child's pose)
- Sit back on your heels and walk your hands forward
- Let your forehead rest on the floor and breathe deeply
Duration: 1-2 minutes, as needed
Key point: Keep knees at hip-width. A very wide knee position can stress the SI joint.
How to Modify Calisthenics Training with SI Joint Pain
You don't have to stop training entirely, but certain modifications are important to avoid aggravating the SI joint.
Exercises to Avoid or Modify
Avoid during the acute phase:
- Heavy single-leg exercises (pistol squats, Bulgarian split squats)
- High-impact movements (box jumps, burpees, running)
- Deep lunges with rotation
- Wide-stance sumo squats
- Asymmetric loaded carries
Modify rather than eliminate:
- Squats: Use a narrower, symmetrical stance; reduce depth; add a wall for support
- Push-ups: Maintain strict core engagement; avoid sagging through the pelvis
- Pull-ups: Focus on engaging your core throughout; avoid swinging
- L-sits: May actually help by building isometric core stability
- Planks: An excellent SI joint-safe exercise; focus on pelvic neutrality
Training Guidelines
- Prioritize bilateral movements over unilateral ones during recovery
- Warm up with stabilization exercises before every training session
- Avoid training through SI pain — sharp or one-sided lower back pain means you should stop that exercise
- Progress single-leg work gradually — start with supported variations before free-standing
- Use an SI belt during training if it helps — this is not a crutch, it supports the joint while you build muscular stability
- Monitor the 24-hour response — if an exercise causes increased symptoms the next day, modify or remove it
Return to Full Training Timeline
- Weeks 1-2: Stabilization exercises only, plus gentle stretching
- Weeks 2-4: Add bilateral bodyweight exercises (squats, push-ups, planks)
- Weeks 4-6: Introduce supported single-leg work (step-ups, split squats with support)
- Weeks 6-8+: Gradually return to full training, monitoring symptoms closely
When to See a Specialist
Seek Immediate Medical Attention If:
- You experience sudden, severe pain after trauma (fall, car accident)
- You develop numbness in the groin or saddle area
- You lose bladder or bowel control
- You have progressive weakness in one or both legs
- You experience unexplained weight loss with back pain
- You have fever with back or pelvic pain
Consult a Healthcare Provider If:
- Symptoms persist beyond 4-6 weeks of consistent self-care
- Pain significantly impacts your daily activities or sleep
- You cannot determine whether your pain is SI joint, lower back, or sciatica
- Symptoms worsen despite following a stabilization program
- You're pregnant or postpartum and experiencing pelvic pain
Specialists Who Can Help
- Physical therapist — for manual therapy, specific exercise prescription, and SI joint mobilization or stabilization techniques
- Orthopedic specialist — for diagnostic imaging and assessment of structural issues
- Sports medicine physician — for active individuals seeking to return to training safely
- Women's health physiotherapist — specifically for pregnancy and postpartum SI joint pain
Prevention Strategies
Once symptoms improve, these strategies help prevent recurrence.
Balanced Training
- Train both sides equally — avoid favoring your dominant side
- Include both bilateral and unilateral exercises in your routine
- Balance pushing and pulling movements to maintain muscular symmetry
- Don't neglect the posterior chain — strong glutes and hamstrings are essential for SI joint health
Core Stability Maintenance
- Continue stabilization exercises 2-3 times per week even after symptoms resolve
- Focus on anti-rotation and anti-extension core work (Pallof press variations, dead bugs, planks)
- Train the deep core — the transverse abdominis and multifidus are your first line of defense
Daily Habits
- Avoid standing on one leg for prolonged periods (shift weight frequently)
- Don't cross your legs while sitting for long periods
- Use a supportive chair with even weight distribution
- Sleep with a pillow between your knees if you're a side sleeper
- Alternate the side you carry bags or always use a backpack
- Take movement breaks every 30-45 minutes when sitting
Smart Training Progression
- Increase training volume gradually — follow the 10% rule for weekly progression
- Don't add single-leg difficulty and load simultaneously — change one variable at a time
- Include a proper warm-up with SI joint stabilization exercises before every session
- Listen to your body — occasional SI joint awareness is normal, but pain is a signal to modify
Sample Weekly Exercise Schedule
Acute Phase (Weeks 1-2)
Daily (morning and evening):
- TrA activation: 10 reps x 10-second holds
- Pelvic floor engagement: 10 reps x 10-second holds
- Glute bridge: 3 sets x 10-12 reps
- Supine marching: 2 sets x 10 per side
Daily (evening):
- Piriformis stretch: 2 x 30-60 seconds per side
- Hip flexor stretch: 2 x 30-60 seconds per side
- Child's pose: 1-2 minutes
Building Phase (Weeks 2-4)
Daily:
- Continue TrA activation as a warm-up
- Stretching routine (evening)
3-4 times per week:
- Bird dog: 3 sets x 8-10 per side
- Dead bug: 3 sets x 8-10 per side
- Glute bridge: 3 sets x 12-15
- Side-lying hip abduction: 3 sets x 12-15 per side
- Clamshell: 2 sets x 15-20 per side
Functional Phase (Weeks 4-8+)
Daily:
- Morning: TrA activation + bird dog warm-up (5 minutes)
- Evening: Stretching routine (10 minutes)
4 times per week:
- Dead bug: 3 sets x 10 per side
- Single-leg glute bridge: 3 sets x 8-10 per side
- Pallof press variation: 3 sets x 10 per side
- Wall sit: 3 sets x 30-45 seconds
- Step-ups: 2 sets x 8-10 per side
- Side-lying hip abduction: 3 sets x 15 per side
Conclusion
SI joint pain can be frustrating, but it responds well to a targeted stabilization approach. Unlike many lower back conditions that focus primarily on flexibility, SI joint dysfunction is best addressed by building the muscular control system that keeps the joint stable under load.
Remember these key principles:
- Stabilize first, stretch second — the SI joint usually needs more stability, not more mobility
- Activate the deep core — the transverse abdominis and pelvic floor are your foundation
- Build symmetry — balanced strength prevents the asymmetric forces that irritate the SI joint
- Progress gradually — return to single-leg and high-impact activities only after establishing a solid stability base
- Seek help when needed — persistent symptoms deserve professional evaluation
By consistently performing these exercises and making smart training modifications, most people with SI joint dysfunction can achieve significant pain relief and return to full activity.
For a comprehensive understanding of the pelvic anatomy and biomechanics that underlie SI joint function, explore our free Anatomy Course, which covers the musculoskeletal system in detail.
References
-
Laslett M, Aprill CN, McDonald B, Young SB. Diagnosis of sacroiliac joint pain: validity of individual provocation tests and composites of tests. Man Ther. 2005;10(3):207-218.
-
Vleeming A, Schuenke MD, Masi AT, Carreiro JE, Danneels L, Willard FH. The sacroiliac joint: an overview of its anatomy, function and potential clinical implications. J Anat. 2012;221(6):537-567.
-
Cohen SP, Chen Y, Neufeld NJ. Sacroiliac joint pain: a comprehensive review of epidemiology, diagnosis and treatment. Expert Rev Neurother. 2013;13(1):99-116.
-
Al-Subahi M, Alayat M, Alshehri MA, et al. The effectiveness of physiotherapy interventions for sacroiliac joint dysfunction: a systematic review. J Phys Ther Sci. 2017;29(9):1689-1694.
-
Rashbaum RF, Ohnmeiss DD, Lindley EM, Kitchel SH, Patel VV. Sacroiliac joint pain and its treatment. Clin Spine Surg. 2016;29(2):42-48.
-
Hammer N, Steinke H, Lingslebe U, et al. Ligamentous influence in pelvic load distribution. Spine J. 2013;13(10):1321-1330.
-
Lee D, Vleeming A. The management of pelvic joint pain and dysfunction. In: Grieve's Modern Musculoskeletal Physiotherapy. 4th ed. Elsevier; 2015.
-
McGill SM. Low Back Disorders: Evidence-Based Prevention and Rehabilitation. 3rd ed. Human Kinetics; 2015.