How to Fix Swayback Posture: Exercises & Corrective Routine
Swayback posture is one of the most misdiagnosed postural dysfunctions. Often confused with anterior pelvic tilt, swayback actually involves the opposite pelvic position combined with a forward shift of the entire hip complex. If you stand with your hips pushed forward, your upper back rounded, and your lower back appearing flat, you likely have swayback posture.
The good news? Swayback is correctable with the right combination of strengthening, stretching, and postural retraining. This guide walks you through the anatomy, causes, self-assessment methods, and a complete corrective routine.
What Is Swayback Posture?
Anatomy of the Dysfunction
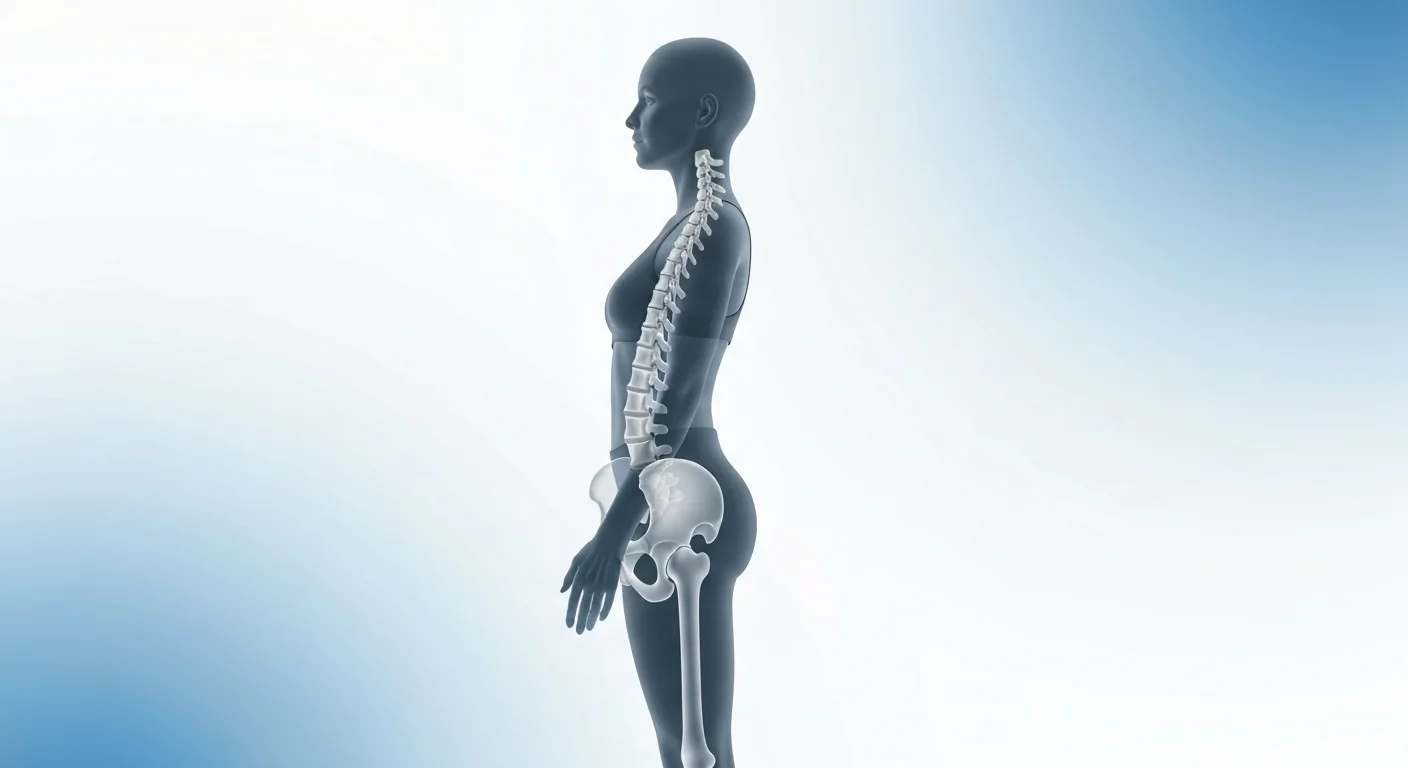
Swayback posture (also called sway-back or hip displacement posture) is characterized by a forward displacement of the pelvis relative to the feet, combined with a posterior pelvic tilt and increased thoracic kyphosis. The result is a distinctive "lazy standing" appearance.
The key features include:
- Forward pelvic shift: The hips push forward past the line of gravity
- Posterior pelvic tilt: The pelvis tilts backward (opposite of anterior pelvic tilt)
- Flattened lumbar spine: Reduced or absent lower back curve
- Increased thoracic kyphosis: Excessive rounding of the upper back
- Forward head posture: Head drifts forward to compensate for the upper back rounding
- Hyperextended knees: Locked-out knees to maintain balance
The Muscle Imbalance Pattern
Swayback creates a specific pattern of tight and weak muscles:
- Tight (short) muscles: Hamstrings, upper abdominals (external obliques, rectus abdominis), upper back extensors
- Weak (lengthened) muscles: Hip flexors (iliopsoas), lower abdominals (transverse abdominis), gluteus maximus, thoracic erector spinae
- Overactive structures: Passive ligamentous support at the hips (hanging on ligaments instead of using muscles)
How Swayback Differs from Anterior Pelvic Tilt
This distinction is critical because the corrective approach is very different:
| Feature | Swayback | Anterior Pelvic Tilt |
|---|---|---|
| Pelvic position | Posterior tilt (tucked under) | Anterior tilt (tipped forward) |
| Hip position | Shifted forward of feet | Over or behind feet |
| Lumbar spine | Flat or reduced curve | Excessive curve (hyperlordosis) |
| Hip flexors | Weak and lengthened | Tight and short |
| Hamstrings | Tight and short | Weak and lengthened |
| Glutes | Weak | Weak |
| Lower back | Flat | Overarched |
Key takeaway: If you stretch your hip flexors thinking you have anterior pelvic tilt when you actually have swayback, you will make the problem worse by further lengthening already weak muscles.
How Swayback Differs from Flat Back Posture
Swayback and flat back posture both feature a posterior pelvic tilt and reduced lumbar curve, but they differ in one important way:
- Flat back: Pelvis stays vertically aligned over the feet, spine is uniformly straight
- Swayback: Pelvis shifts forward of the feet, creating the distinctive "sway" with upper back compensation
The forward hip displacement is the defining characteristic of swayback.
Want to understand the musculoskeletal mechanics? Our free Anatomy Course provides detailed lessons on pelvic and hip musculature, biomechanics, and rehabilitation protocols—perfect for understanding why these dysfunctions occur and how to correct them systematically.
Common Causes
- Prolonged standing with poor habits - Leaning on one hip, shifting weight forward, "hanging" on joints instead of engaging muscles
- Sedentary lifestyle - Hours of sitting leading to weak hip flexors and glutes
- Weak core and hip musculature - Inability to maintain an upright posture, so the body collapses into passive structures
- Habitual slouching - Allowing the pelvis to drift forward while the upper body rounds back
- Fatigue-related posture - When tired, the body defaults to ligament support rather than muscular support
- Overtraining hamstrings and abs without hip flexor work - Creates the imbalance pattern
- Footwear and standing surfaces - Soft shoes or prolonged time on hard surfaces encourage passive standing
Why It Matters
Beyond the aesthetic concerns, untreated swayback leads to:
- Chronic lower back pain from ligamentous stress
- Hip joint wear and impingement
- Knee hyperextension and pain
- Neck pain and headaches from forward head compensation
- Reduced athletic performance and power output
- Increased injury risk during squats, deadlifts, and running
- Thoracic mobility restrictions affecting overhead movements
Self-Assessment: Do You Have Swayback?
Test 1: The Plumb Line Test (Side View Photo)
This is the most reliable self-test:
- Have someone take a side-view photo of you standing naturally
- Draw a vertical line from your ear down through your body
- Normal alignment: The line passes through your ear, shoulder, hip, knee, and ankle
- Swayback: The hip is visibly forward of this line, the shoulders are behind the hips, and the upper back is rounded
Test 2: The Wall Test
- Stand with your back against a wall, heels about 4 inches out
- Let your body rest naturally against the wall
- Normal: Head, upper back, and buttocks touch the wall comfortably
- Swayback indicators: Your buttocks touch the wall first, your upper back touches but your lower back is flat against the wall (no arch), and your head may not reach the wall without effort
Test 3: The Hip Position Test
- Stand naturally and look down at your feet
- Place your fingers on the bony front of your hip bones (ASIS)
- Normal: Hip bones are roughly over your toes
- Swayback: Hip bones are visibly forward of your toes, with your weight shifted into the front of your feet
When to See a Professional
Consult a physical therapist, chiropractor, or postural specialist if you experience:
- Persistent lower back or hip pain
- Numbness or tingling in legs
- Pain that worsens despite corrective exercises
- History of spinal injury or surgery
- Significant movement restrictions
The Fix: Complete Corrective Protocol
Phase 1: Stretch Tight Muscles
Address the overactive muscles that pull you into swayback.
1. Standing Hamstring Stretch
Target: Hamstrings (biceps femoris, semitendinosus, semimembranosus)
- Place one heel on a low step or bench (knee straight but not locked)
- Hinge forward at the hips with a neutral spine (don't round your back)
- Feel the stretch in the back of your thigh, not your lower back
- Hold 45-60 seconds per side, 2-3 times daily
Key cue: Maintain a flat back throughout—rounding defeats the purpose
2. Supine Hamstring Stretch with Strap
Target: Hamstrings (isolated)
- Lie on your back, loop a towel or strap around one foot
- Extend leg toward ceiling, keeping opposite leg flat on floor
- Gently pull until you feel a moderate stretch
- Hold 60 seconds per side
3. Upper Abdominal Stretch (Cobra/Sphinx)
Target: Rectus abdominis, external obliques
- Lie face-down on the floor
- Place hands under shoulders (sphinx: forearms flat)
- Press up, extending your upper back while keeping hips on the floor
- Focus on opening the front of your torso
- Hold 30-45 seconds, 3 sets
Note: This is not a lower back exercise—focus on feeling the stretch through your abdominals
4. Foam Roll Thoracic Spine
Target: Thoracic extensors, upper back tightness
- Lie on your back with a foam roller under your mid-back
- Support your head with your hands
- Slowly extend over the roller, opening your chest
- Roll from mid-back to upper back
- Spend 2-3 minutes, pausing on tight spots
Phase 2: Strengthen Weak Muscles
This is the most important phase. Swayback is primarily a weakness problem.
5. Standing Hip Flexor March (Psoas Strengthening)
Target: Iliopsoas (the primary muscle that is weak in swayback)
- Stand tall with neutral spine, hands on a wall for balance if needed
- Lift one knee above 90 degrees (thigh past parallel)
- Hold the top position for 3-5 seconds
- Lower slowly with control
- Focus on pulling the knee up using your deep hip flexors, not momentum
Perform 3 sets of 10-12 reps per side, daily
Why this matters: Weak hip flexors are the hallmark of swayback. Strengthening them is essential.
6. Supine Hip Flexor Hold (Isometric)
Target: Iliopsoas (isometric strengthening)
- Lie on your back, knees bent, feet flat
- Lift one knee toward your chest to 90 degrees
- Press your hand against your knee while resisting with your hip flexor
- Hold for 10-15 seconds per side
- Focus on feeling the contraction deep in the front of your hip
Perform 3 sets of 6-8 holds per side, daily
7. Glute Bridges with Emphasis on Hip Extension
Target: Gluteus maximus
- Lie on your back, feet flat on floor, hip-width apart
- Drive through heels, lift hips toward ceiling
- Squeeze glutes hard at the top without hyperextending the lower back
- Hold top position for 3 seconds
- Lower slowly
Perform 3 sets of 15-20 reps, 4-5 times per week
Cue: Think about driving your hips up and forward (not just up)
8. Dead Bug
Target: Deep core (transverse abdominis), hip flexor coordination
- Lie on your back, arms extended toward ceiling
- Lift legs to tabletop position (90-degree hip and knee angle)
- Press lower back flat into the floor
- Slowly extend opposite arm and leg while maintaining flat back contact
- Return to start, alternate sides
Perform 3 sets of 10-12 reps per side, daily
Key: If your back arches off the floor, reduce the range of motion
9. Plank with Posterior Weight Shift
Target: Core stabilization in a corrected position
- Start in a standard plank position (forearms or hands)
- Instead of letting hips sag forward, actively push your hips back slightly so your body weight shifts toward your heels
- Maintain a straight line from head to heels
- Engage glutes and deep core throughout
Hold 30-45 seconds, 3-4 sets, daily
Why this variation: Standard planks can reinforce swayback if done with hips pushed forward. This variation teaches you to stack your body correctly.
10. Wall Lean Hip Flexor Strengthening
Target: Iliopsoas (functional strengthening)
- Stand with your back flat against a wall
- Walk your feet about 12 inches from the wall
- Maintain your lower back pressed into the wall
- Lift one knee to 90 degrees, hold 5 seconds
- Lower slowly and switch
Perform 3 sets of 8-10 reps per side, 3-4 times per week
Progression: Add ankle weights as strength improves
11. Thoracic Extension on Foam Roller
Target: Thoracic erector spinae (strengthening mid-back extension)
- Sit on the floor, foam roller behind your mid-back
- Support your head, lean back over the roller
- Actively extend your thoracic spine (don't just passively drape)
- Hold the extended position for 5 seconds, then return
- Move the roller up slightly and repeat
Perform 3 sets of 8-10 reps, 3-4 times per week
12. Bird Dogs
Target: Posterior chain coordination, spinal stabilizers
- Start on hands and knees, neutral spine
- Extend opposite arm and leg simultaneously
- Maintain a flat back—no rotation or sagging
- Hold 3-5 seconds, return slowly
Perform 3 sets of 10 reps per side, 4-5 times per week
Phase 3: Postural Retraining
Exercises alone won't fix swayback if you continue standing and sitting in the dysfunctional pattern all day.
Standing Posture Correction
The single most important habit change:
- Pull your hips back - Your hip bones should be over your ankles, not in front of them
- Unlock your knees - Maintain a slight bend, never hyperextend
- Engage your glutes lightly - A gentle 10-20% contraction keeps the pelvis supported
- Lift your chest - Think about growing taller through your thoracic spine
- Stack your ribs over your pelvis - Ribs shouldn't flare forward or collapse backward
Practice drill: Stand with your back against a wall. Walk your hips back until they touch the wall. Maintain a gentle lumbar curve (small gap behind your lower back). Step away from the wall and try to maintain this position.
Sitting Posture
- Sit on your sit bones (the bony points you feel when you rock side to side)
- Maintain a slight lumbar curve
- Avoid slouching into a posterior pelvic tilt
- Feet flat on the floor
- Stand and move every 30 minutes
Movement Breaks
Set a timer every 30-45 minutes:
- Stand up and perform 10 hip flexor marches per side
- 5 glute squeezes (hold 10 seconds each)
- Wall lean hip flexor lifts: 5 per side
- 30-second plank with posterior weight shift
- Walk around for 2-3 minutes
Sleep Position
- Side sleeping: Place a pillow between your knees to maintain alignment
- Back sleeping: A small pillow under your knees can reduce strain
- Avoid stomach sleeping: Forces lumbar extension and neck rotation
Sample Corrective Routine
Daily Quick Routine (10-12 minutes)
Perform this every day for consistent improvement:
- Hamstring stretches: 60 sec per side
- Upper ab stretch (cobra): 3 x 30 sec
- Hip flexor marches: 3 x 10 per side
- Dead bugs: 3 x 10 per side
- Glute bridges: 3 x 15
- Plank with posterior weight shift: 3 x 30 sec
Full Corrective Session (25-30 minutes, 3-4x per week)
- Foam roll thoracic spine: 3 min
- Hamstring stretches: 60 sec per side
- Supine hamstring stretch with strap: 60 sec per side
- Upper ab stretch (cobra): 3 x 30 sec
- Strengthening circuit:
- Hip flexor marches: 3 x 12 per side
- Supine hip flexor isometric holds: 3 x 8 per side
- Glute bridges: 3 x 20
- Dead bugs: 3 x 12 per side
- Wall lean hip flexor lifts: 3 x 10 per side
- Thoracic extension on foam roller: 3 x 10
- Bird dogs: 3 x 10 per side
- Plank with posterior weight shift: 3 x 45 sec
Ongoing Habits
- Hourly posture checks (hips back, knees unlocked)
- Movement breaks every 30-45 minutes
- Conscious standing posture correction
- Avoid hanging on your hip ligaments
Ergonomic Tips for Swayback Prevention
At Your Desk
- Use a chair with firm lumbar support to maintain your lower back curve
- Position your monitor at eye level to reduce forward head posture
- Keep feet flat on the floor with hips and knees at 90 degrees
- Alternate between sitting and standing every 30-60 minutes
While Standing
- Distribute weight evenly between both feet
- Wear supportive shoes with moderate arch support
- Use an anti-fatigue mat if standing for long periods
- Avoid leaning on counters, desks, or one hip
During Exercise
- Cue "hips back" during squats, deadlifts, and standing exercises
- Avoid locking out knees at the top of any movement
- Maintain a slight lumbar curve during overhead pressing
- Focus on hip flexor engagement during leg raises and hanging exercises
Timeline: How Long Does Correction Take?
Realistic expectations based on severity and consistency:
- 1-2 weeks: Improved postural awareness, reduced habitual hip-forward position
- 4-6 weeks: Noticeable strength gains in hip flexors and glutes, less reliance on passive standing
- 8-12 weeks: Significant postural improvement with consistent daily work
- 3-6 months: Full correction, neutral alignment becomes your default standing pattern
Critical success factor: Daily practice is non-negotiable. Swayback develops over years of habitual positioning—correcting it requires building new movement patterns through repetition.
Common Mistakes to Avoid
- Treating it like anterior pelvic tilt - Stretching hip flexors and strengthening hamstrings will make swayback worse
- Only stretching without strengthening - Swayback is primarily a weakness problem; stretching alone won't fix it
- Ignoring hip flexor strengthening - The iliopsoas is the single most important muscle to strengthen for swayback correction
- Locking out knees while standing - Hyperextended knees feed directly into the swayback pattern
- Doing sit-ups and crunches for "core work" - These shorten the upper abs, which are already tight in swayback
- Neglecting standing posture habits - Exercise for 30 minutes a day cannot overcome 15 hours of poor posture
- Forcing lumbar extension - The goal is to restore a natural curve, not create an excessive arch
- Rushing the process - Postural adaptation takes weeks of consistent work
Advanced Considerations
For Athletes and Lifters
- Reassess squat and deadlift setup—swayback often causes a rounded lower back under load
- Add loaded hip flexor marches (ankle weights or cable)
- Include single-leg deadlifts for glute and hip stability
- Practice goblet squats with emphasis on upright torso
- Use pallof press variations for rotational core stability
- Focus on hip hinge drills to relearn proper hip mechanics
When Swayback Persists
If consistent effort for 12+ weeks shows minimal improvement:
- Professional postural assessment - May have structural factors contributing to the pattern
- Manual therapy - Physical therapy, massage, or chiropractic care can help release chronically tight tissues
- Gait analysis - Walking and running patterns may be reinforcing the dysfunction
- Footwear evaluation - Shoes with no arch support or excessive cushioning can contribute
- Screen for other conditions - Hypermobility syndromes, previous injuries, or neurological factors
Connection to Anatomy Education
Understanding the hip flexor complex, pelvic biomechanics, and core function is essential for effectively correcting swayback posture. Our comprehensive Anatomy Course includes detailed modules on:
- The Muscles of the Lower Extremity - Hip flexors, glutes, hamstrings, and their clinical relevance
- Pelvic biomechanics and movement patterns
- Evidence-based rehabilitation approaches for postural dysfunction
Conclusion
Swayback posture is a distinct postural dysfunction that requires a specific corrective approach—one that differs significantly from the more commonly discussed anterior pelvic tilt. The keys to correction are:
- Strengthen the hip flexors (especially the iliopsoas)
- Activate and strengthen the glutes
- Build deep core stability
- Stretch tight hamstrings and upper abdominals
- Retrain your standing posture (pull hips back, unlock knees)
The most common mistake is misidentifying swayback as anterior pelvic tilt and applying the wrong corrective strategy. If your hips are pushed forward and your lower back is flat, you have swayback—and strengthening (not stretching) your hip flexors is the priority.
Commit to the daily routine, make conscious posture corrections throughout the day, and be patient. Within 8-12 weeks of consistent effort, you should see meaningful improvements in your alignment, reduced pain, and better athletic performance.
Ready to deepen your understanding? Enroll in our free Anatomy Course and learn the scientific foundations of musculoskeletal health, biomechanics, and injury prevention. Get certified and take your knowledge to the professional level.
References
- Kendall, F. P., et al. Muscles: Testing and Function with Posture and Pain. 5th ed. Lippincott Williams & Wilkins, 2005.
- Sahrmann, S. A. Diagnosis and Treatment of Movement Impairment Syndromes. Mosby, 2002.
- Neumann, D. A. Kinesiology of the Musculoskeletal System: Foundations for Rehabilitation. 3rd ed. Elsevier, 2017.
- Page, P., Frank, C. C., & Lardner, R. Assessment and Treatment of Muscle Imbalance: The Janda Approach. Human Kinetics, 2010.
- McGill, S. M. Low Back Disorders: Evidence-Based Prevention and Rehabilitation. 3rd ed. Human Kinetics, 2015.